Swagger and ASP.NET Web API - Part I: Adding Swagger to Web API project
This is part one of a series on using Swagger with ASP.NET Web API.
All source code for this series can be found here.
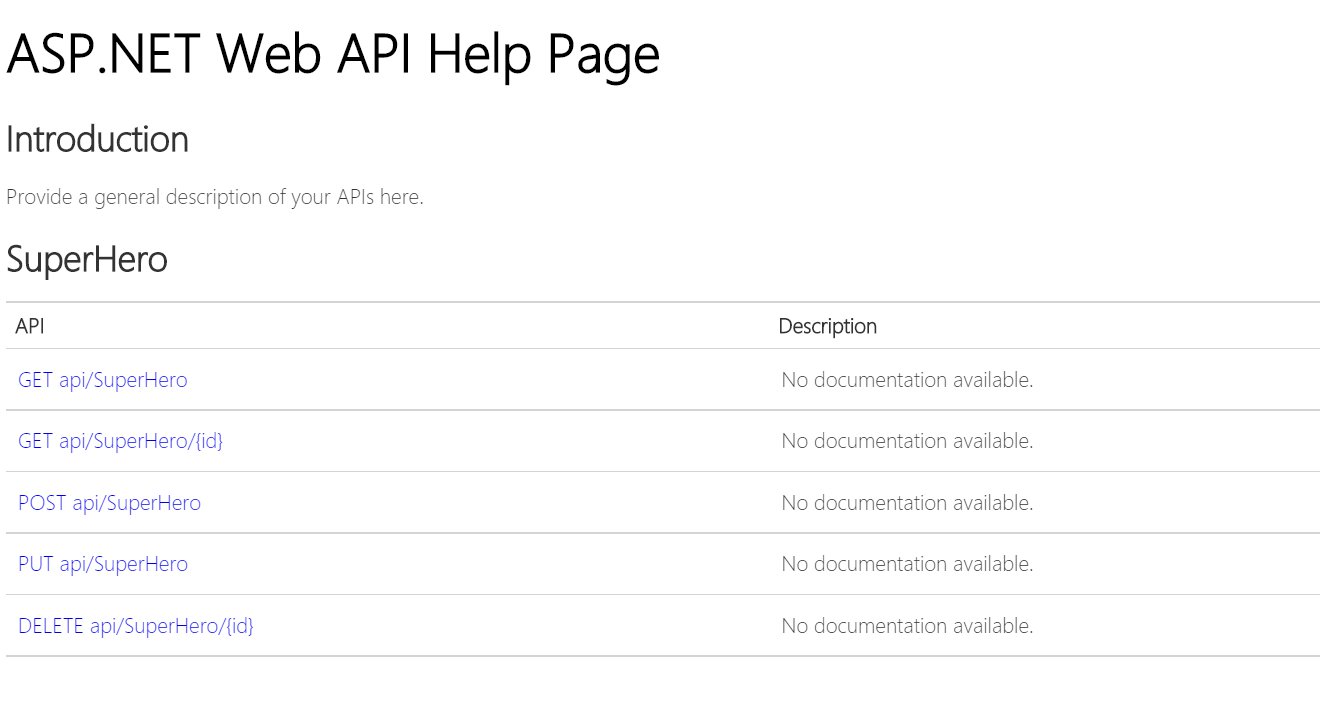
When you create a new ASP.NET Web API project, a nuget package called Microsoft ASP.NET Web Api Help Page is installed to generate help page content for the web APIs on your site. In my previous post <a href=”http://wmpratt.com/runscope-and-continuous-integration/” target=_“blank”>Runscope and continuous integration</a>, I used this to provide descriptions for the APIs. The help page package is a good start but it is lacking things like discoverability and live interactions. This is where Swagger comes to the rescue.
“Swagger is a simple yet powerful representation of your RESTful API. With the largest ecosystem of API tooling on the planet, thousands of developers are supporting Swagger in almost every modern programming language and deployment environment. With a Swagger-enabled API, you get interactive documentation, client SDK generation and discoverability.”
ASP.NET Web API Help Page documentation
Swagger documentation
Adding Swagger to your Web API does not replace ASP.NET Web API help pages. You can have both running side by side, if desired.
Adding Swagger to Web Api Project
To add Swagger to an ASP.NET Web Api, we will install an open source project called Swashbuckle via nuget.

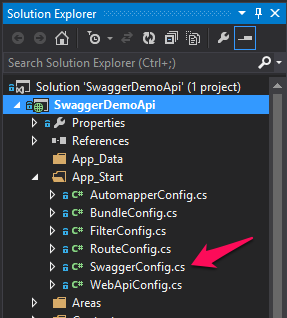
After the package is installed, navigate to App_Start in the Solution Explorer. You’ll notice a new file called SwaggerConfig.cs. This file is where Swagger is enabled and any configuration options should be set here.
Configuring Swagger
At minimum you’ll need this line to enable Swagger and Swagger UI.
GlobalConfiguration.Configuration
  .EnableSwagger(c => c.SingleApiVersion("v1", "A title for your API"))
  .EnableSwaggerUi();
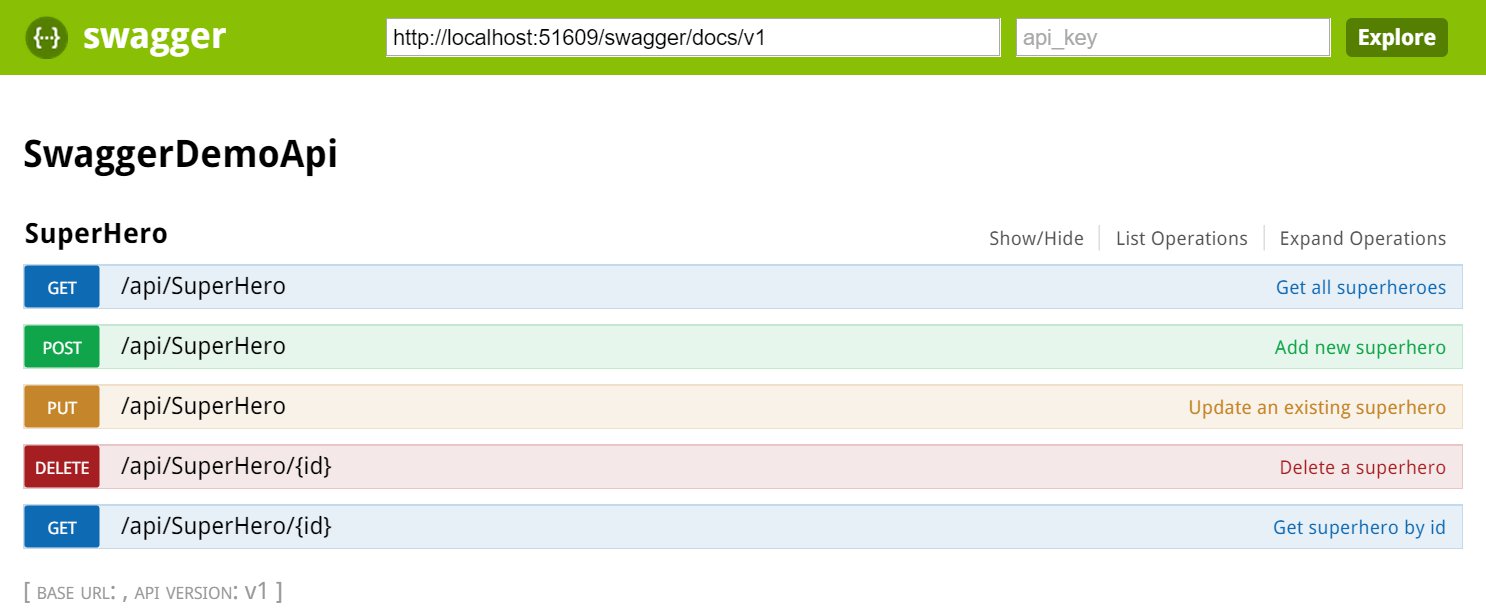
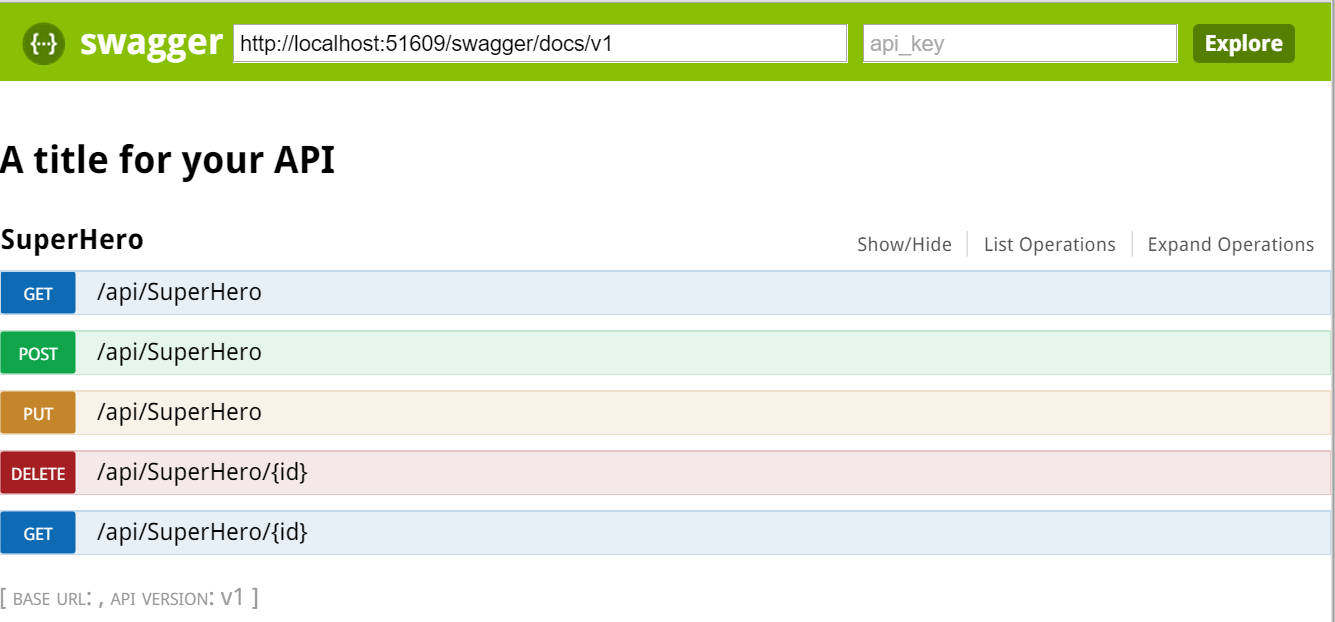
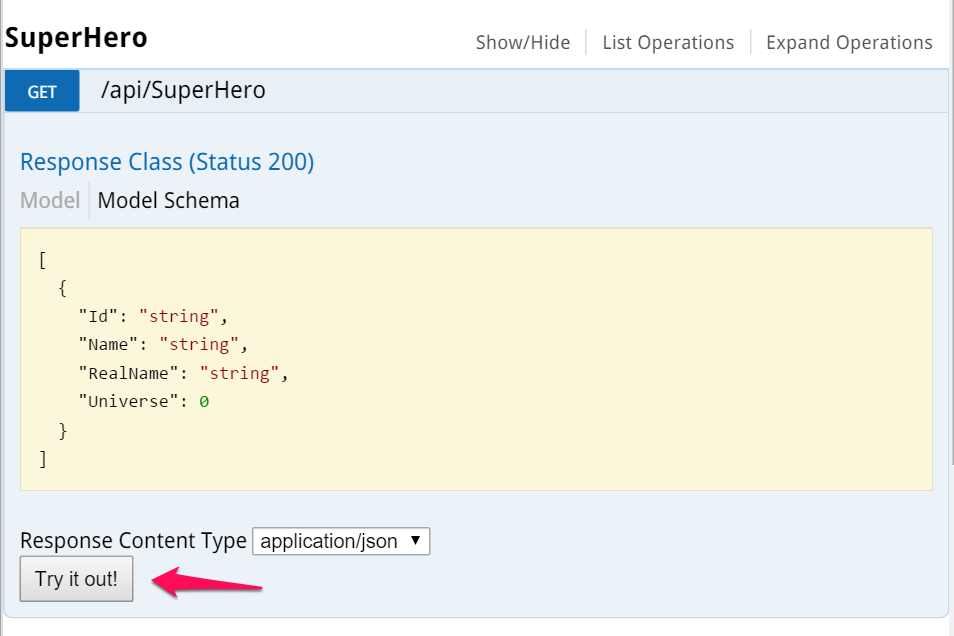
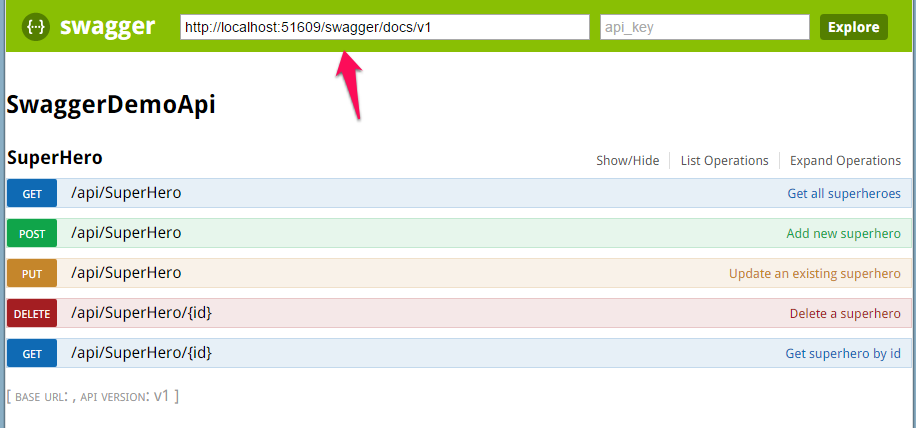
Start a new debugging session (F5) and navigate to http://localhost:[PORT_NUM]/swagger. You should see Swagger UI help pages for your APIs.
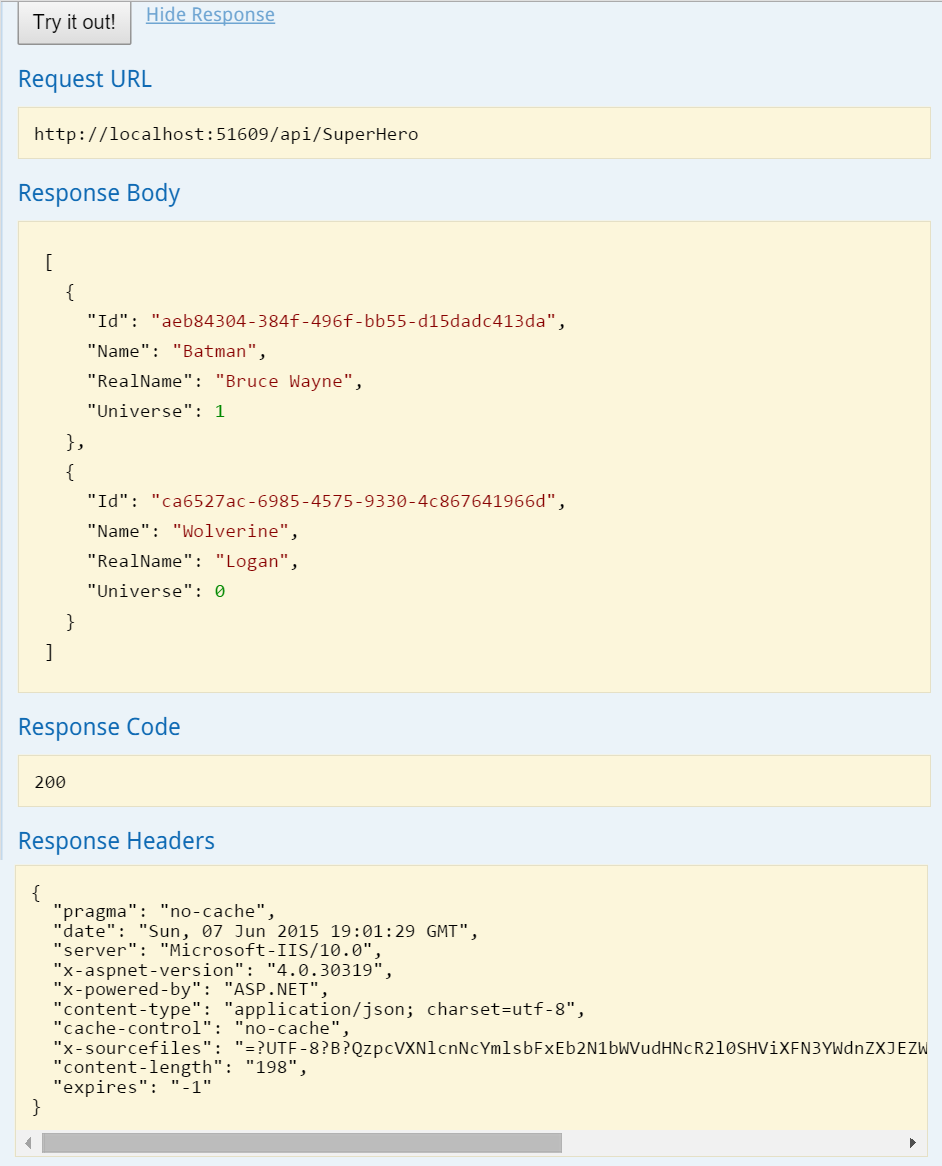
Expanding an api and clicking the “Try it out!” button will make a call to that specific API and return results. Pretty cool!
Enable Swagger to use XML comments
The minimum configuration is nice to get started but let’s add some more customization. We can tell Swashbuckle to use XML comments to add more details to the Swagger metadata. These are the same XML comments that ASP.NET Help Pages uses.
First, enable XML documentation file creation during build. In Solution Explorer right-click on the Web API project and click Properties. Click the Build tab and navigate to Output. Make sure XML documentation file is checked. You can leave the default file path. In my case its bin\SwaggerDemoApi.XML

Next, we need to tell Swashbuckle to include our XML comments in the Swagger metadata. Add the following line to SwaggerConfig.cs. Make sure to change the file path to the path of your XML documentation file.
c.IncludeXmlComments(string.Format(@"{0}\bin\SwaggerDemoApi.XML", System.AppDomain.CurrentDomain.BaseDirectory));
Full configuration, so far
GlobalConfiguration.Configuration
  .EnableSwagger(c =>
    {
      c.SingleApiVersion("v1", "SwaggerDemoApi");
      c.IncludeXmlComments(string.Format(@"{0}\bin\SwaggerDemoApi.XML",
                           System.AppDomain.CurrentDomain.BaseDirectory));
    })
  .EnableSwaggerUi();
Finally, if you haven’t already, add XML comments to your Models and API methods.
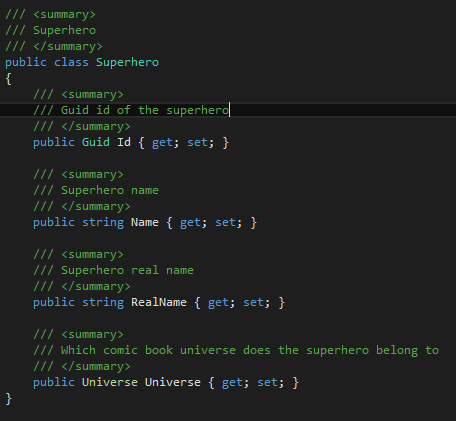
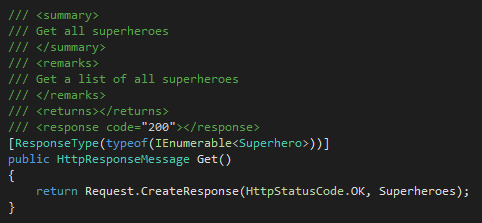
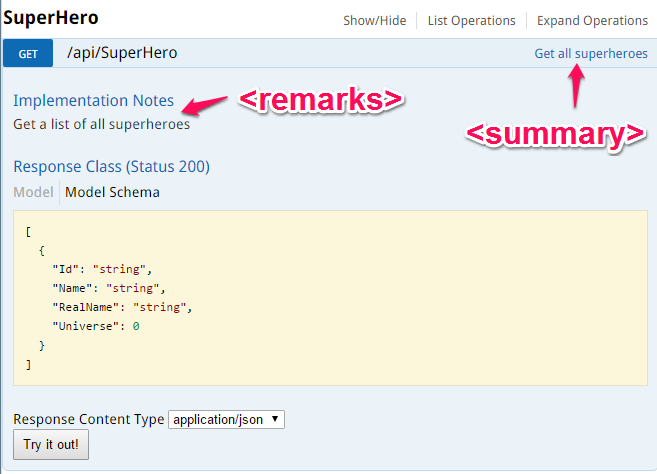
Run the project and navigate back to /swagger. You should see more details added to your API documentation. I’ve highlighted a few below with their corresponding XML comment.
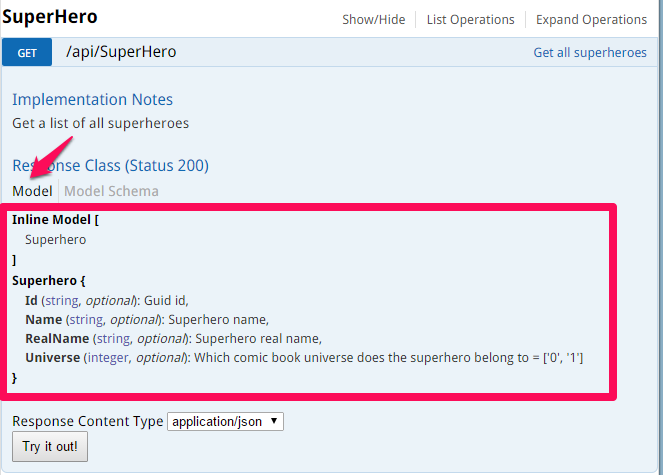
Under Response Class, click Model. You should see any XML comments added to your models.
Describing Enums As Strings
My Superhero class contains an Enum property called Universe which represents which comic universe they belong to.
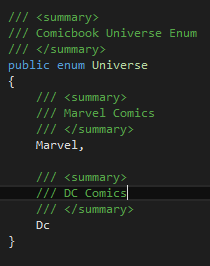
By default, Swagger displays these Enum values as their integer value. IMO, this is not very descriptive. Let’s change it to display the string representation.
Add the following line to SwaggerConfig.cs
c.DescribeAllEnumsAsStrings();
The full swagger configuration at this point
GlobalConfiguration.Configuration
  .EnableSwagger(c =>
  {
    c.SingleApiVersion("v1", "SwaggerDemoApi");
    c.IncludeXmlComments(string.Format(@"{0}\bin\SwaggerDemoApi.XML",
                         System.AppDomain.CurrentDomain.BaseDirectory));
    c.DescribeAllEnumsAsStrings();
  })
  .EnableSwaggerUi();
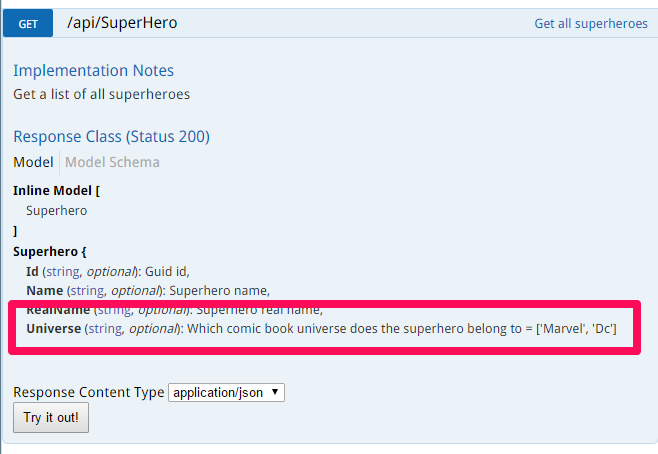
If I look at Swagger now, the Universe Enum values are displayed as strings. Much better!
These are just a few of the many configuration options you can specify in Swashbuckle to create your Swagger metadata. I encourage you to review the other options on Swashbuckle’s GitHub.
Swagger JSON file
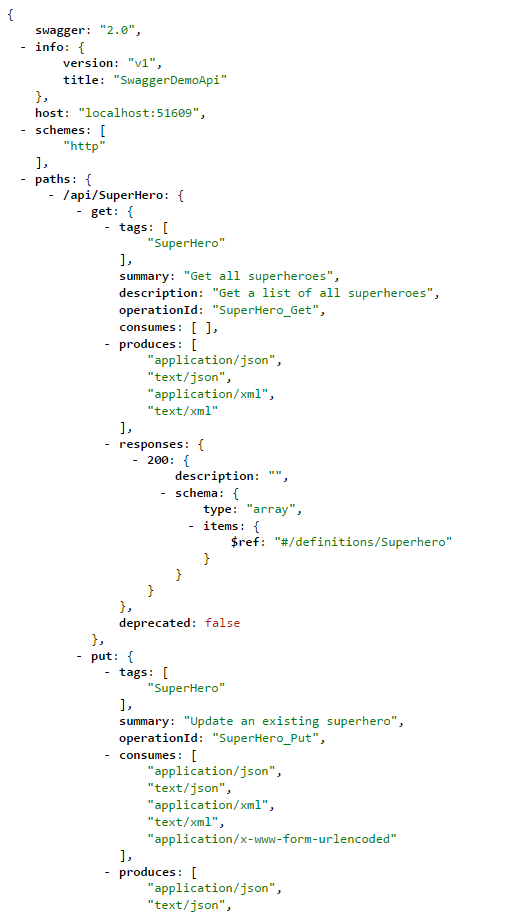
What we’ve seen so far is a UI representation our API Swagger metadata. To see the actual “Swagger”, navigate to the URL that is in the header of the Swagger UI documentation page.
This is how your API is discoverable. The Swagger metadata can be used to tell other APIs how to interact with yours. You can also create a client library to interact with your API that can be distributed to customers/users/integration partners.
Here is a sample of my Swagger metadata
The Microsoft Azure team is currently in the process of including Swagger in their new Azure App Service, currently in Preview. I encourage you to watch the //build/ 2015 talk about Azure App Service Architecture with Scott Hanselman and Scott Hunter.
Source code for this series: github.com/billpratt/SwaggerDemoApi
Related Posts